How To Use Metamask Wallet To Transfer Your Cryptocurrencies
What is MetaMask Wallet?
MetaMask Wallet is one of the popular choices of non-custodial Ethereum wallets. It is a software wallet that can be used on your browser and mobile application to manage your cryptocurrency assets.
MetaMask Wallet is actually created by a global community of developers and designers based on a decentralised blockchain technology. Their aim is to empower individuals to interact on the web based on consent, privacy, and free association.
If you’ve concerns whether or not a software wallet should be your go to choice, you should take a look at this article first where we give you a break down of the different types of cryptocurrency wallets.
How to use MetaMask Wallet?
Knowing how to use MetaMask wallet is a straight forward process. You can simply follow the step-by-step guide below to create your MetaMask Wallet.
Access the MetaMask Wallet’s Website: https://metamask.io/
Make sure that the URL is stated as above.
Download Meta Mask Chrome Extension
To be able to use MetaMask Wallet, you have to download MetaMask wallet extension with the only supported browser listed below:
- Chrome
- Firefox
- Brave
- Edge
We’ll be using Chrome as an example:
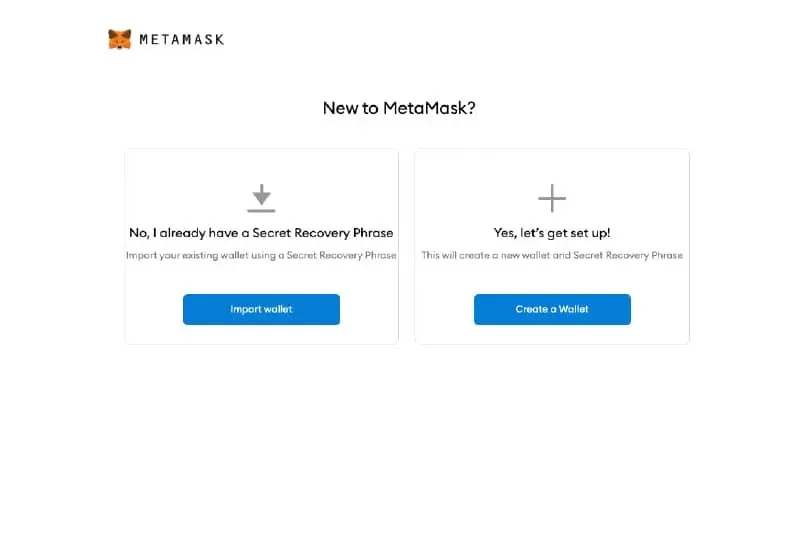
If you have not created a MetaMask Wallet yet, click on “Create A Wallet”Create A Wallet Account
This section will guide you through what you need to do for the creation of your MetaMask Wallet account.
After Clicking on “Create A Wallet”, decide if you’d want to opt in or out of MetaMask’s Data Collection program to help improve their platform.
Of course, before agreeing to any terms and conditions, it’s advisable to know what you’re signing up for by going through them.
When it comes to dealing with cryptocurrencies, it’s never a hassle to spend some time to understand blockchain related technology that involves smart contracts.
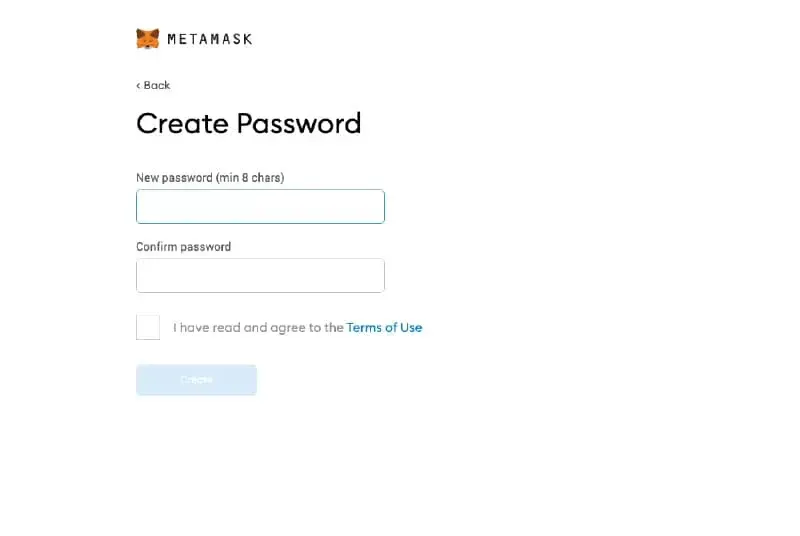
After making your selection, you will be prompted to create the password to your MetaMask Wallet Account.
Selecting Seed Phrase (Important)
This step will be the most important section of “How to use MetaMask wallet” because this is entirely different from creating a password for your MetaMask Wallet.
You’ll need to pay extra attention as this will determine if you’ll end up losing your account entirely and not being able to recover it.
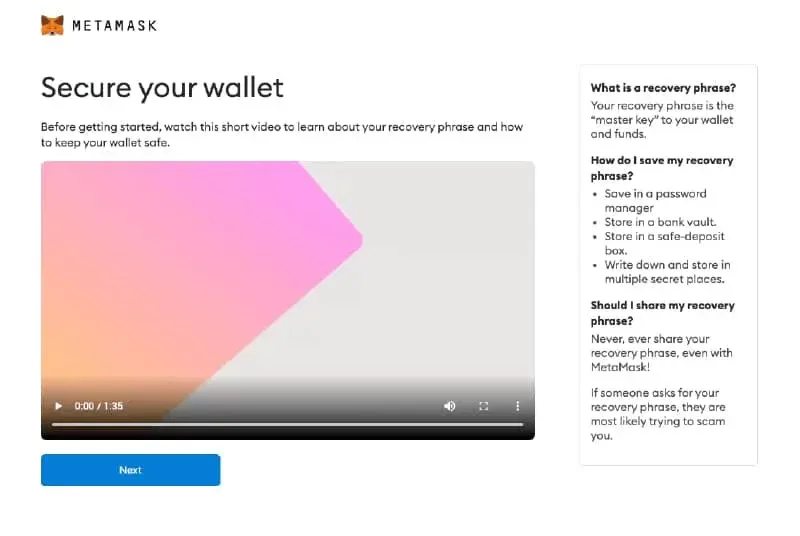
You’re about to proceed with the step to set your recovery phrase/ seed phrase for your MetaMask Wallet.
This section shows you a video on how to secure your MetaMask Wallet with a Recover phrase that’s usually made up of random words that you’re supposed to safe keep. Take 1.5mins of your time to watch the video.
When you’ve completed watching the video, you’ll begin generating your seed phrase.
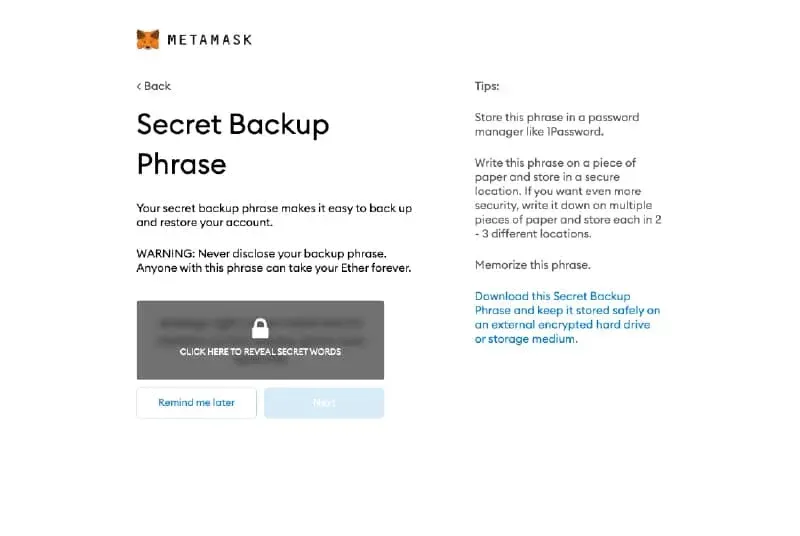
“Click on Reveal Secret Words” – You need to keep your seed(recovery) phrase somewhere safe and private.
This set of seed phrases should never be shared with anyone as they will be allowed to have access to your funds!
The secret backup phrase also helps to restore your account if you happened to change your computer/mobile phone, or should you lost your password to your MetaMask Wallet account.
There are several ways that you can keep your password safe:
- Write on a piece of paper
- Save on an Encrypted Thumb-drive
You can store them away in a bank vault, a Safe-deposit box or different places that only you know how to gain access to.
After verifying your seed (recovery) phrase, you’re considered successful in completing your MetaMask Wallet creation.
What Can I Do With A MetaMask wallet?
There is more to managing your cryptocurrency assets with your metamask wallet, such as depositing, sending and receiving cryptocurrencies funds.
Transactions & Other Interactions
You can also use the MetaMask Wallet to interact with your other existing wallet from your cryptocurrency exchange (if any).
It will be more convenient to have some Ether in your Metamask Wallet as you can readily pay Gas Fees whenever you’re required to perform any transactions on the blockchain.
Adding cryptocurrencies to your MetaMask account (such as ETH and ERC-20 or, ERC-721 tokens) allows you to invest, trade, play games, and own unique digital items (NFT collectibles).
MetaMask Wallet Swap
Metamask wallet also has a swap feature that allows you to make a cryptocurrency swap within the desktop extension.

MetaMask Supports Only Ethereum-Based Tokens
MetaMask wallet only supports Ethereum and any Ethereum-based token (erc20, 721, etc). You can see the full list of a supported tokens here.
You can also use your hardware wallet with MetaMask as they currently support Trezor and Ledger on the extension. However, the MetaMask wallet currently do not support hardware wallet on mobile.
On a side note, if you’d like to unify all your software wallets, you should definitely check out mycrypto.com to integrate all your other wallets that you might have all at one dashboard.
How To Use MetaMask Wallet To Send And Receive Funds
One thing that you can truly appreciate when it comes to sending and receiving your crypto funds using MetaMask Wallet is the ease of use.
Its intuitive user interface design makes the process very simple.
Adding Tokens On MetaMask Wallet To Manage
For sending or receiving any crypto assets, you’ll need to make sure to add the token in the MetaMask Wallet first as shown below:
Receiving Ethereum (ETH) Or ETH Based Crypto Assets On Metamask Wallet


For this example, we will show you how to use MetaMask Wallet and receive your funds by withdrawing Ethereum (ETH) from your Binance custodial wallet.
If you’re using other Ethereum based tokens, please select the accordingly.
Used Network: Ethereum Network (ERC20)
Access Fiat And Spot Wallet From Binance
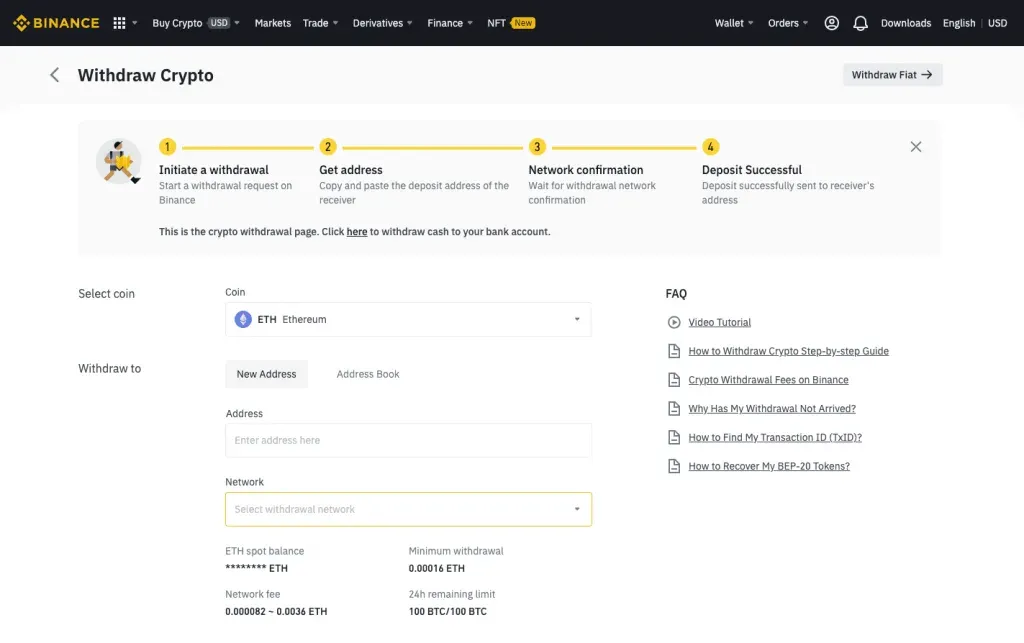
In your Binance account, go to your Fiat And Spot wallet and search for Ethereum. Click on “withdraw” Ethereum

You should see the following withdrawal dashboard for Ethereum where you need to input your personal MetaMask Wallet address specifically for Ethereum Mainnet (ERC20) only.
Never ever let anyone tell you otherwise to key in any other address other than your own.
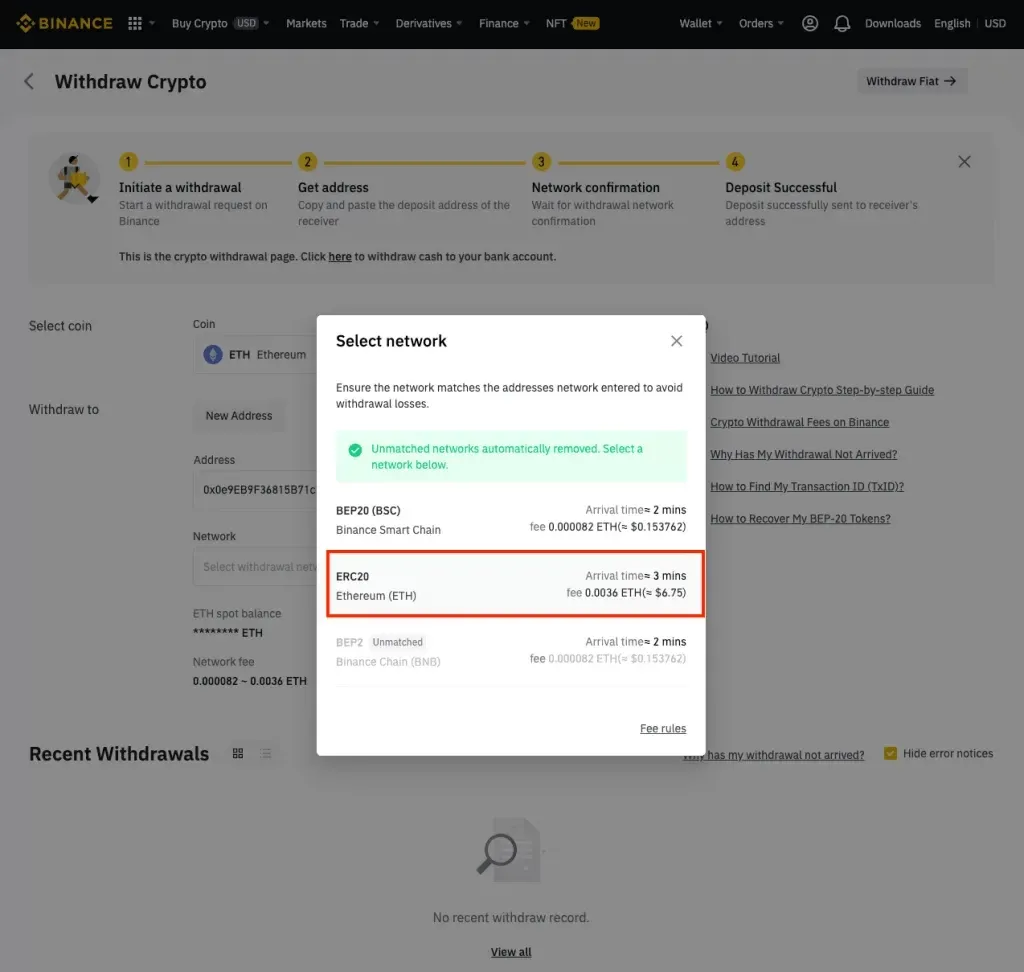
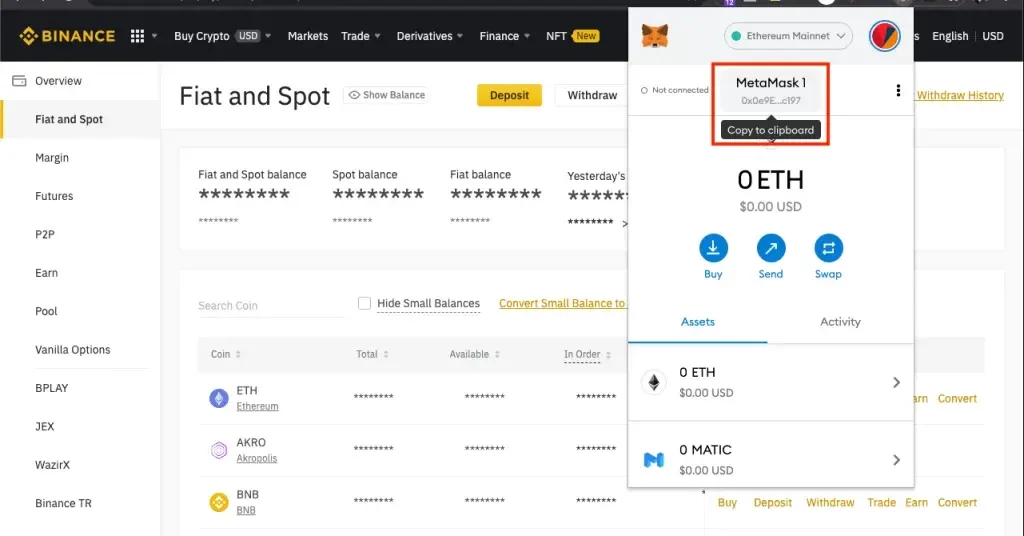
Copy Ethereum Mainnet Address
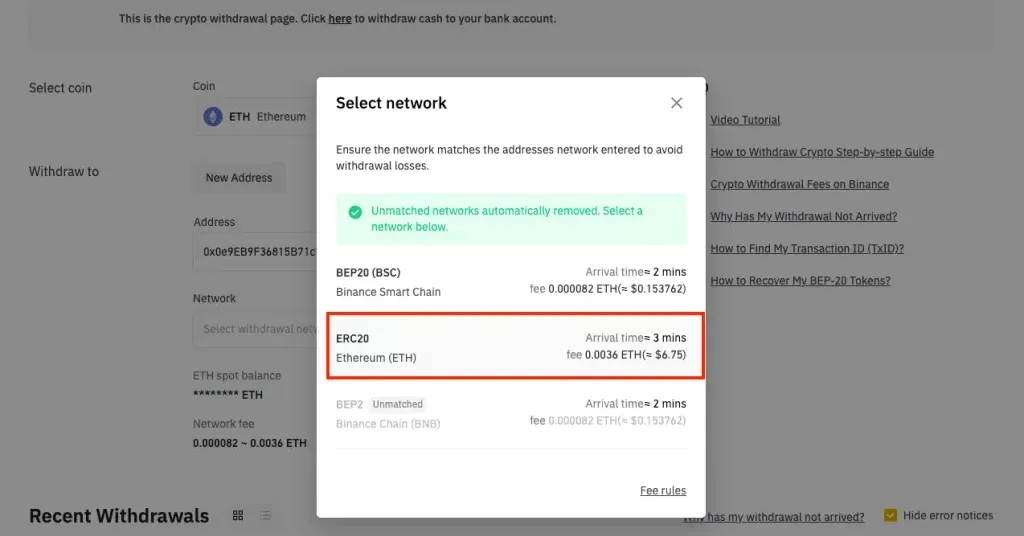
Open MetaMask Wallet from your extension and copy the Ethereum Mainnet Address and paste it into Binance Address input section.

Make sure you have selected ERC20 Network to transfer your Ethereum.
Gas fee varies from time to time, sometimes they may be higher depending on the status of the network congestion.
Confirm Transaction Details
You’ll be prompted to double-check the details you have provided before the transaction is executed on the blockchain.
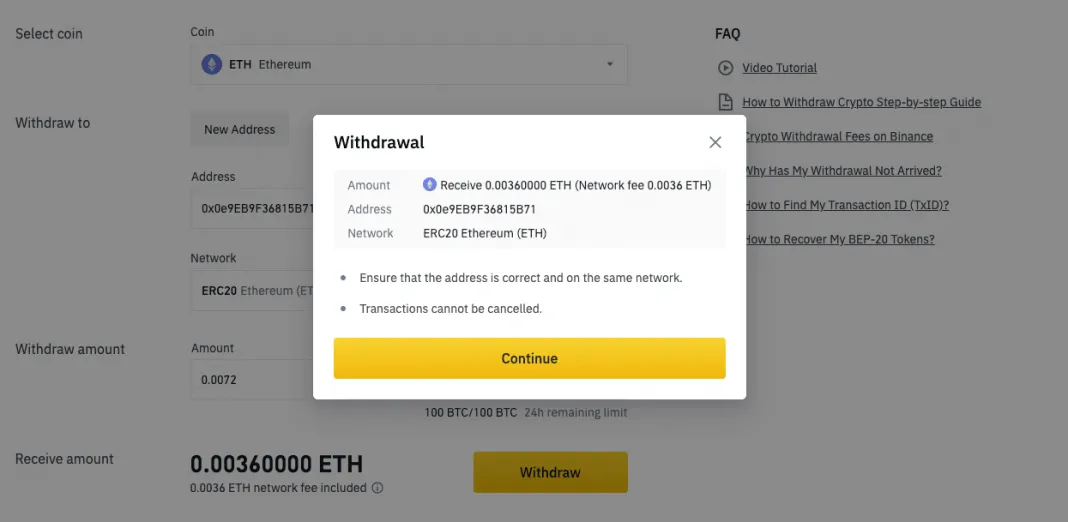
Click on “Continue” and complete the security verification to complete the transaction.
Two-step verification process involves entering the codes provided to your email and via an SMS phone verification.
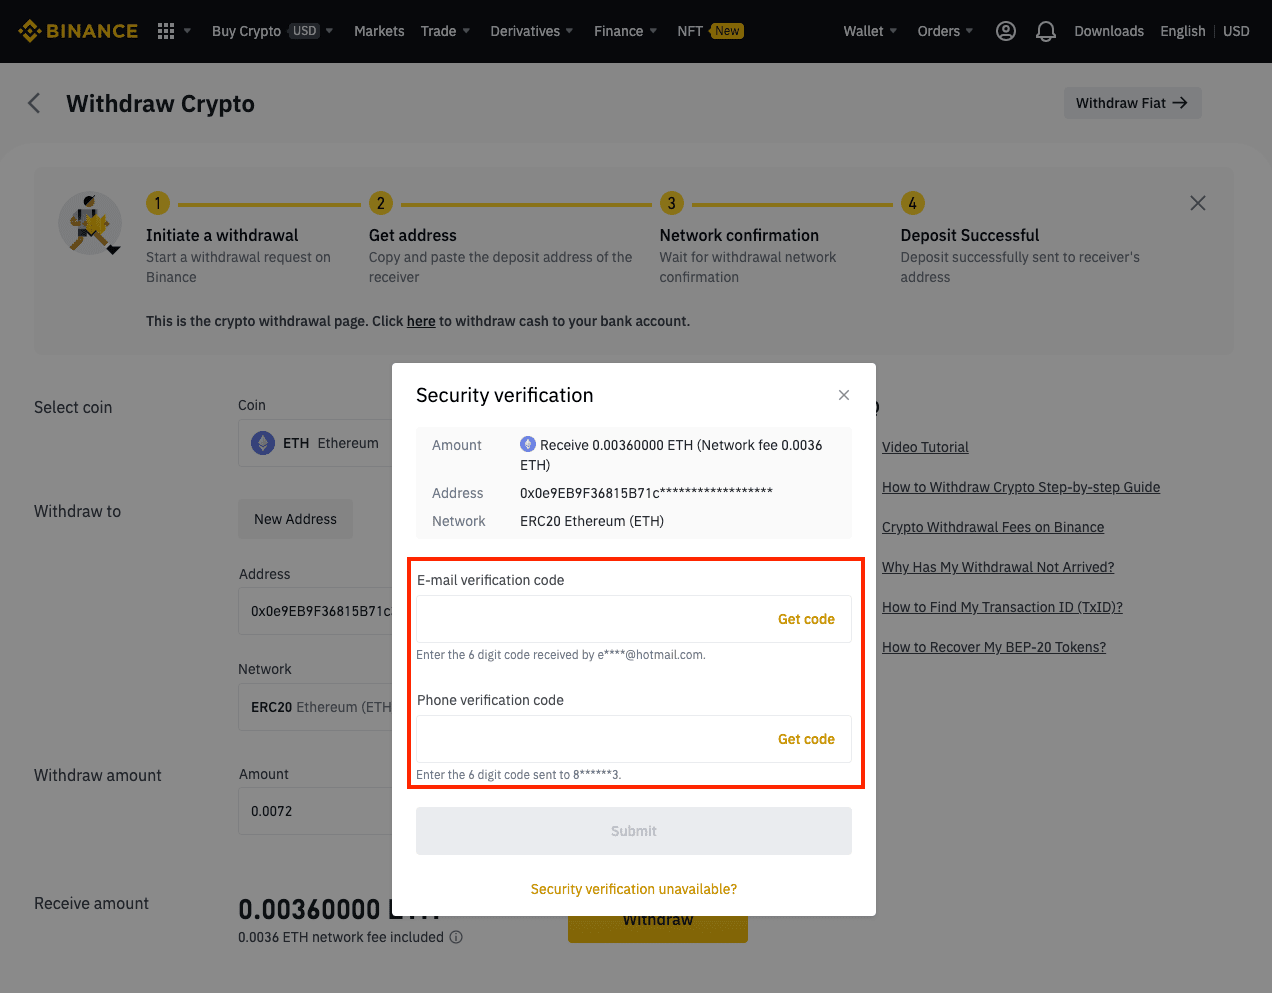
Click on “Submit” once you’re done.
You’ll be able to see something like a “Withdrawal Request Submitted”
Check MetaMask Wallet
You can now re-open your MetaMask Wallet Plugin to double-check if your funds have been transferred over.
Sometimes it will take longer to display on your MetaMask Wallet depending on how congested the ERC20 Network is at that moment.
Send Ethereum (ETH) Or ETH Based Crypto Assets from Metamask Wallet
In this section, we will show you how to use MetaMask Wallet to send your crypto assets to your Binance wallet.
Sending Ethereum (ETH) Or other ETH Based Crypto Assets from MetaMask Wallet is quite similar to the process of receiving assets.
Access Fiat And Spot Wallet From Binance
In your Binance account, go to your Fiat And Spot wallet and search for Ethereum. Click on “Deposit” Ethereum or the other ETH-based crypto assets you want to deposit in Binance.
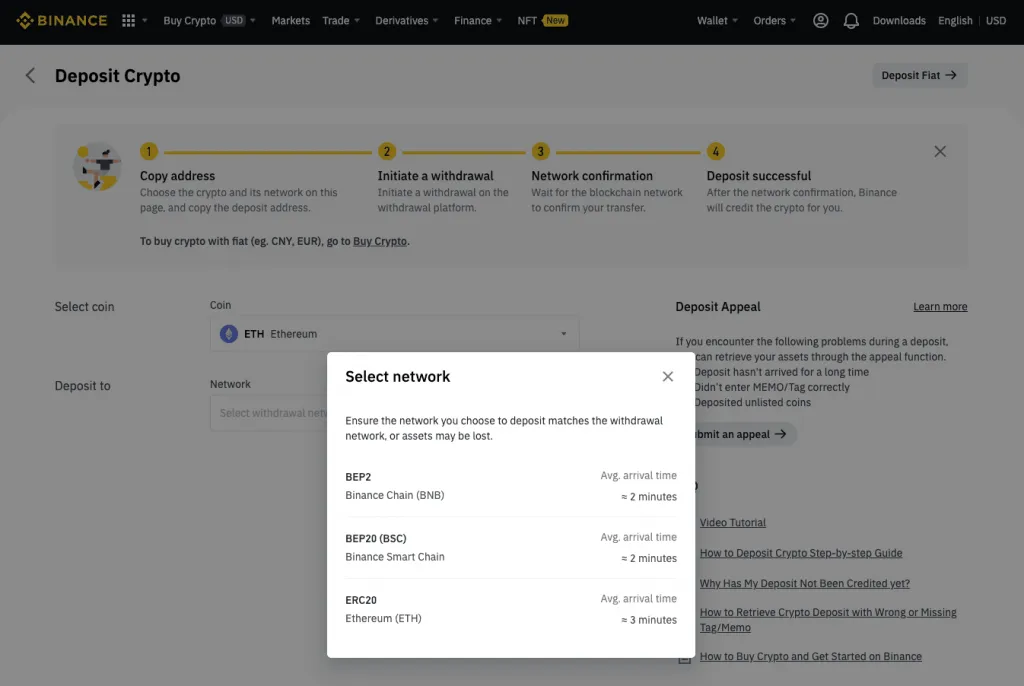
Select ERC20 Network
You’ll need to select the correct network for the transaction to be successful.
Network: ERC20
Copy ERC20 Deposit Address
You should only be sending your crypto assets to the deposit address provided on this Deposit Crypto page.
Access MetaMask Wallet Paste Deposit Address
After copying the deposit address from Binance, open your MetaMask extension and click on “Send” ETH. Make sure you’re also on the. Ethereum Mainnet.


You’ll notice under the transaction fee (gas fee) section there are 3 different settings, slow, average, and fast. It indicates how you want your transaction to be processed.
At the time of viewing this, your transaction fee might be different from what you see above. It can get more expensive or not and it's entirely dependant on the network’s congestion status.
Confirm Transaction
Use MetaMask Wallet extension. You should be able to preview the overall amount and gas fee you will incur for that transaction to take place.
If you accept, you can click on “Confirm”
Summary
Learning how to use MetaMask wallet can take some time to get used to.
The trick is to a successful transaction is to double-check your address inputs and to make sure that you’re using the correct network for your transfer.
Want to find out how you can use Binance Smart Chain Network (BSC) to reduce your gas fees?
Stay tuned for more.